Restart Theme Documentation
First of all thanks so much for purchased my item. I really appreciated it and hope you enjoy it!
To download the theme log into your ThemeForest account page and go to ThemeForest downloads page. Locate the theme that you had purchased and then download the installable WordPress file only.
Now that you've downloaded the theme here is how to install it.
Before beginning the installation and configuring of your new theme, you must first have WordPress with latest version already installed on a server.
2. WordPress Upload. This is definitely the easier route for the most. Simply navigate to Appearance › Add New Themes › Upload. Click “browse” button and locate restart.zip theme folder. The theme will be uploaded and installed in a matter of seconds.
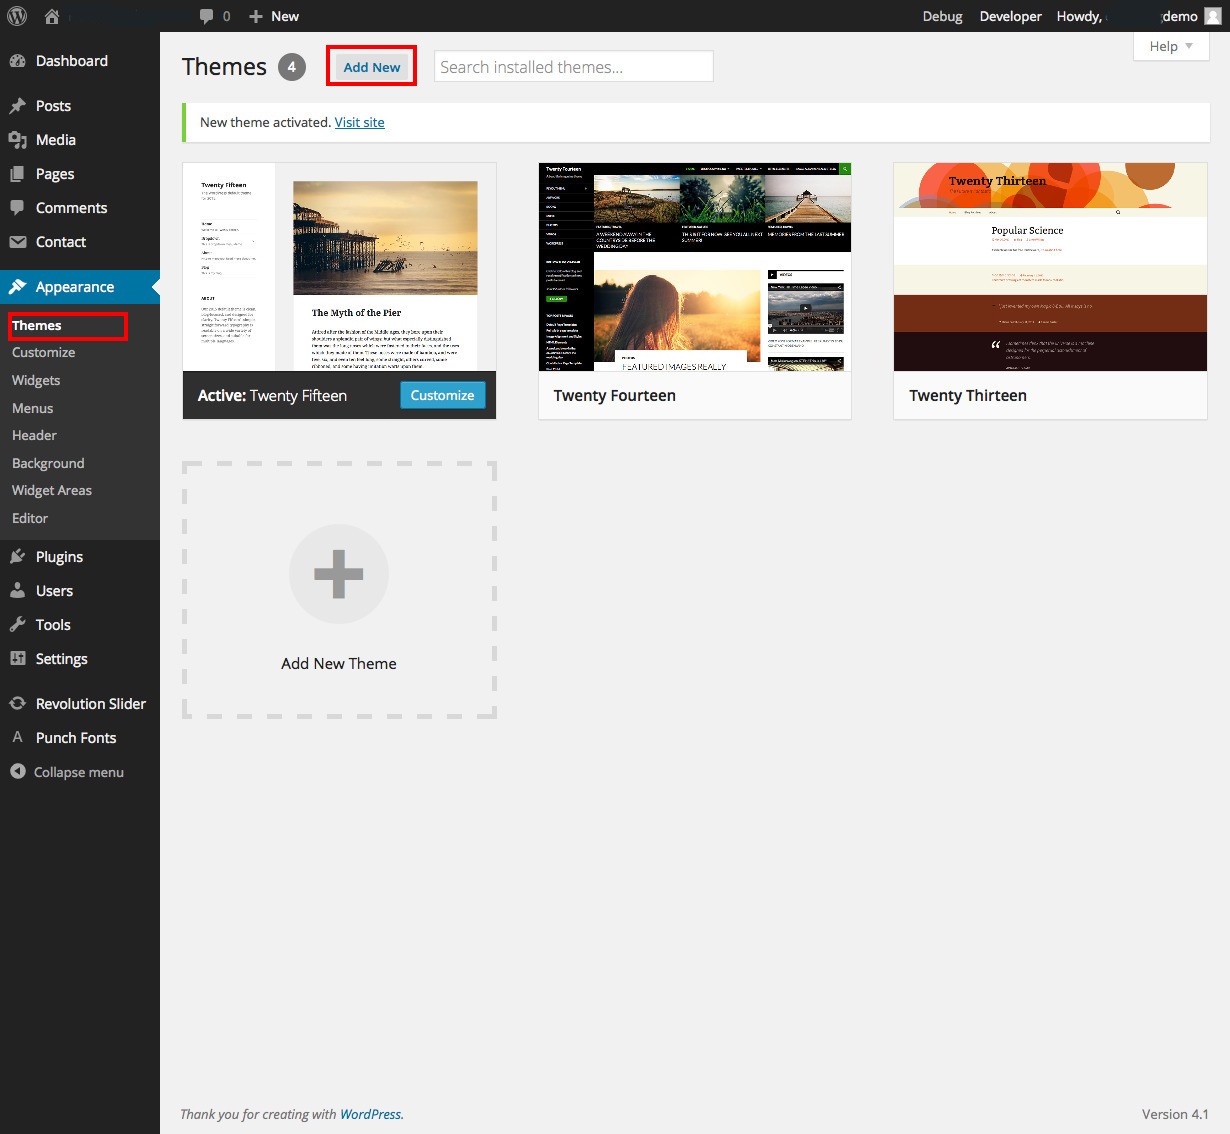
Step 1: Go to Appearance -> Themes then click to Add New
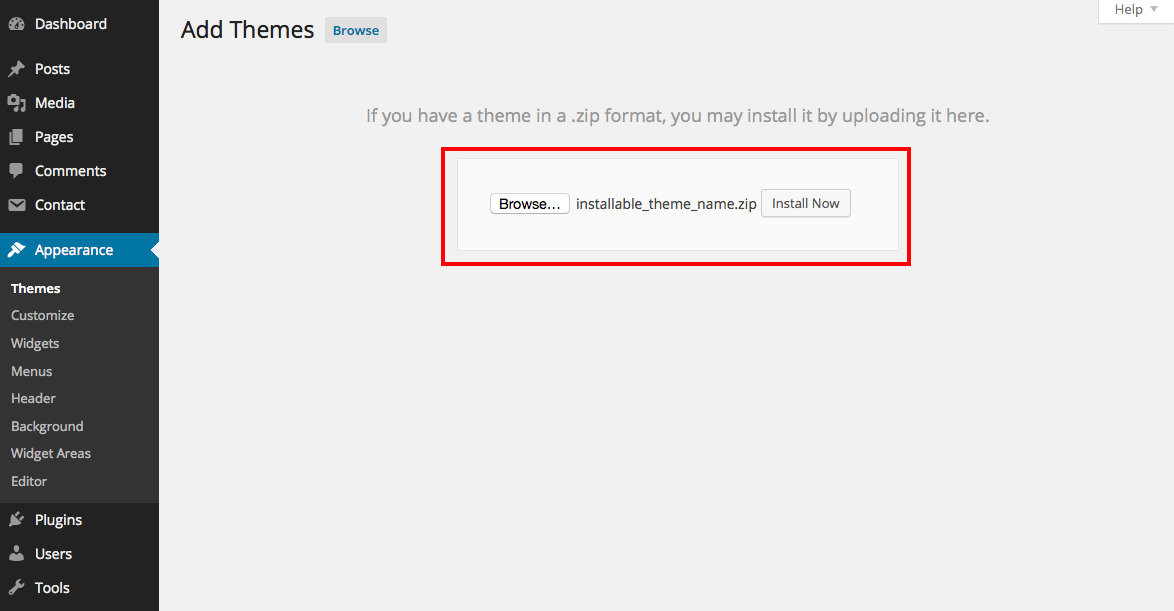
Step 2: Upload your installable theme file you had download from guide above, and then click Install Now
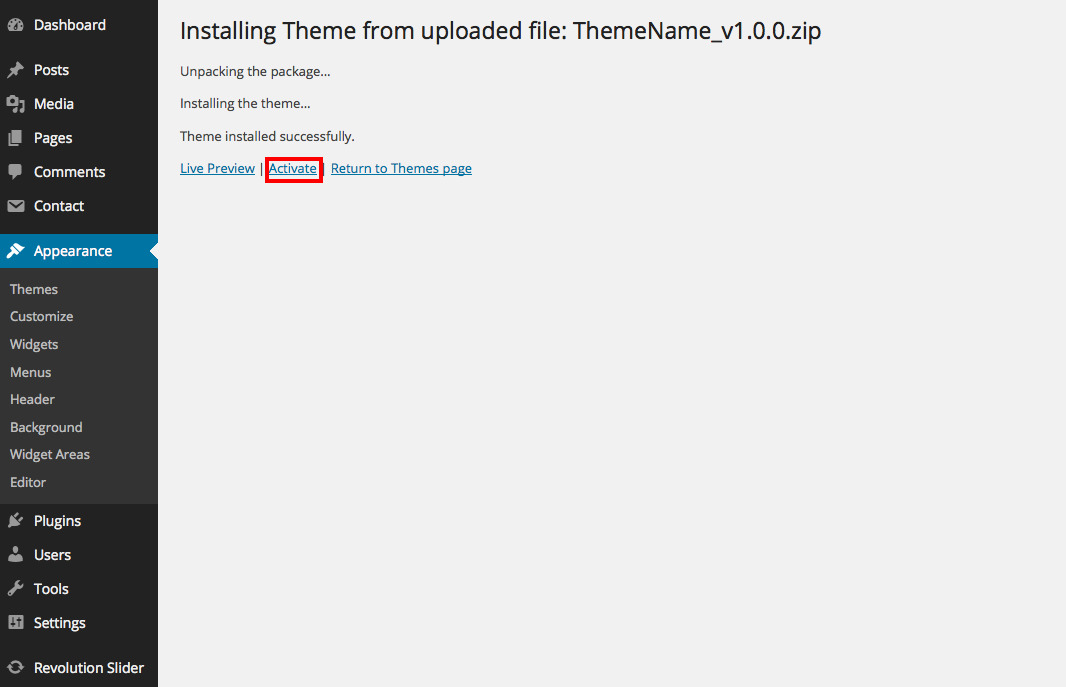
Step 3: After the installation progress completed, click Activate to activate your theme.
Video tutorial: Upload and install the theme, install and activate required/recommended plugins, and import the demo data with a single click: https://www.youtube.com/watch?v=k3OHYdzCUDk.
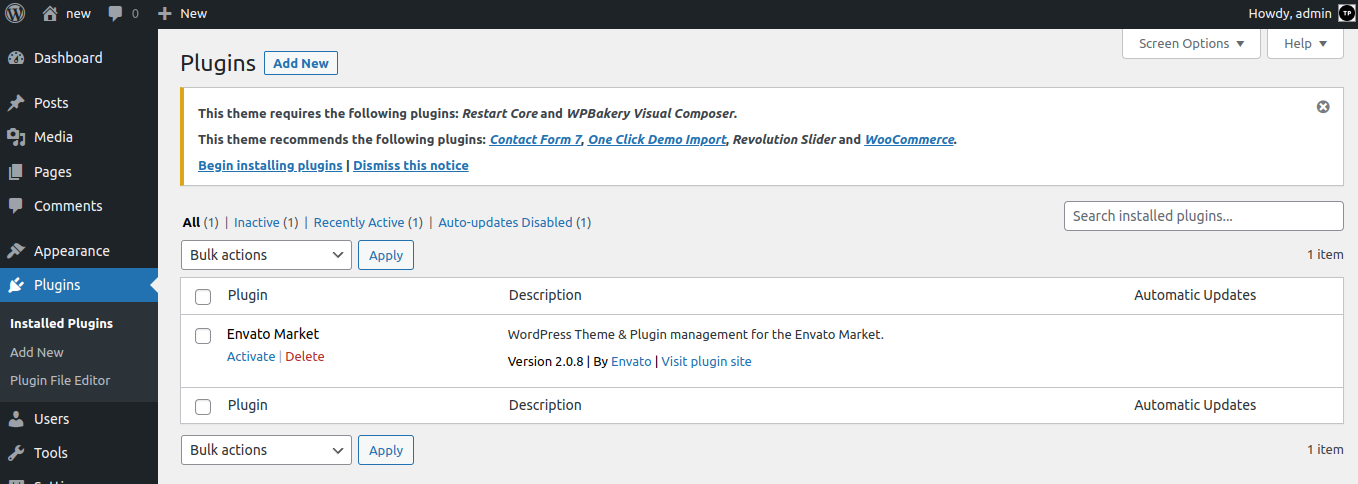
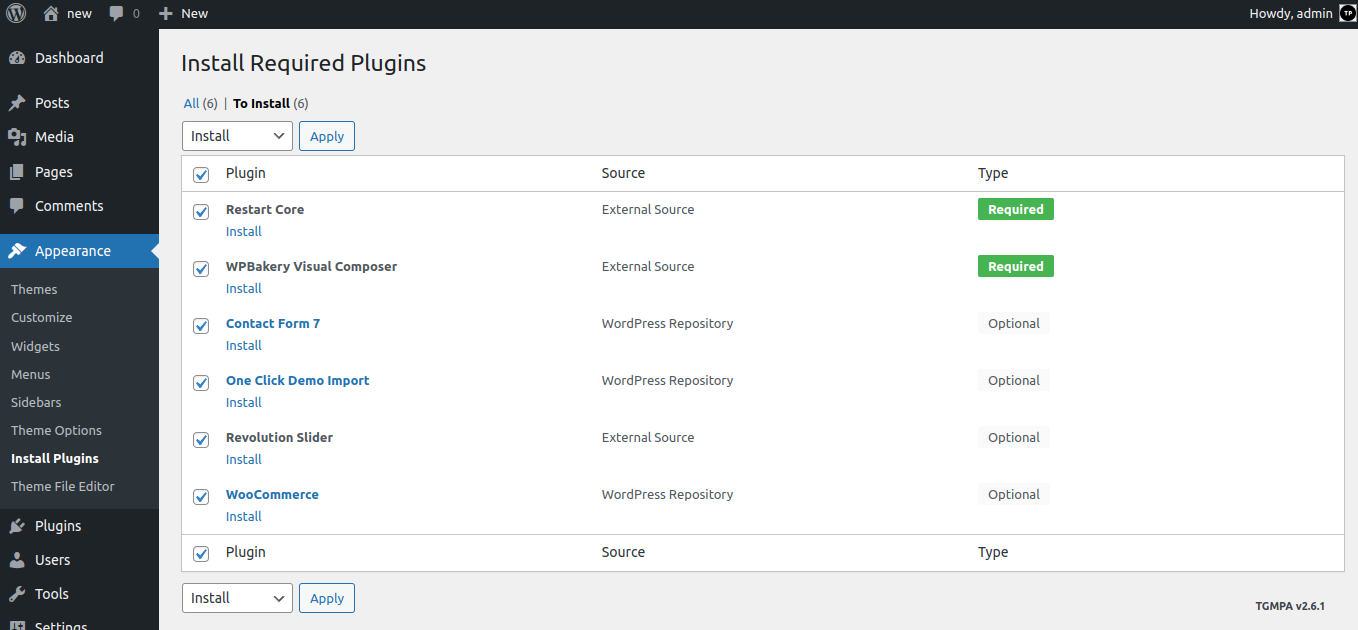
Once you have installed and activated the theme you will be prompted to install required and recommended plugins. Just click the link to begin installing plugins.
Next, check boxes to select all the plugins you want to install, select the bulk action of install from the dropdown box and then click the button to apply.
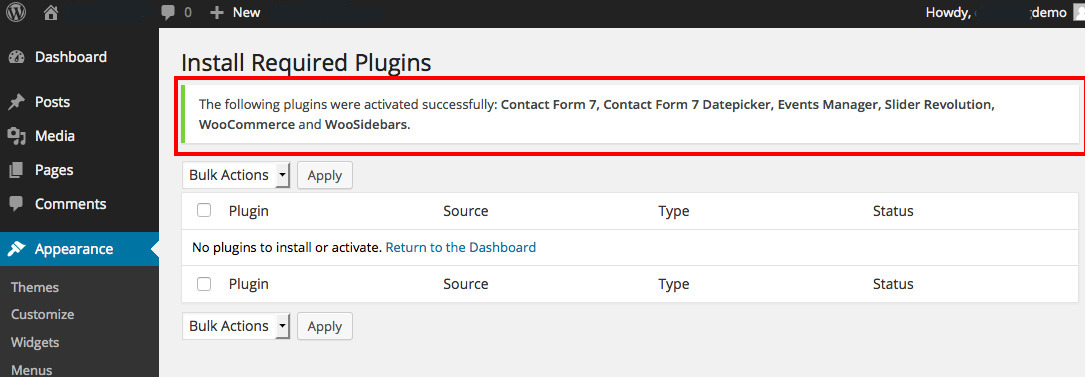
Select the plugins you had installed, and then apply the bulk action to activate them.
Finally, you will got a confirmation notice that your plugins were activeded.
Video tutorial: Upload and install the theme, install and activate required/recommended plugins, and import the demo data with a single click: https://www.youtube.com/watch?v=k3OHYdzCUDk.
Video tutorial: Upload and install the theme, install and activate required/recommended plugins, and import the demo data with a single click: https://www.youtube.com/watch?v=k3OHYdzCUDk.
This theme offer one click demo data import solution with the integrated: OCDI WP Plugin.
Go to Appearence > Import Demo Data and click to Import Demo Data.
Importing can take a couple of minutes depending on your host, you should see a success confirmation when the importing is completed.
WooCommerce Page Setting After Import Demo Data: If you use WooCommerce and you have activated WooCommerce plugin, after the demo data has been imported, you will need to manually select the pages for it.
Go to WooCommerce > Settings > Products > and here select Shop page from imported demo pages and press Save changes button.
Go to WooCommerce > Settings > Advanced and here select Cart, Checkout, and My Account pages from imported demo pages and press Save changes button.
List of page available in demo data imported:

That's all, your site now look exactly as in the demo and ready to use.
If the script auto importing demo data doesn't works with your host, i had included sample data within the theme files, take a look at the folder /restart/framework/inc/demo.
Here are these steps for manually importing demo files:
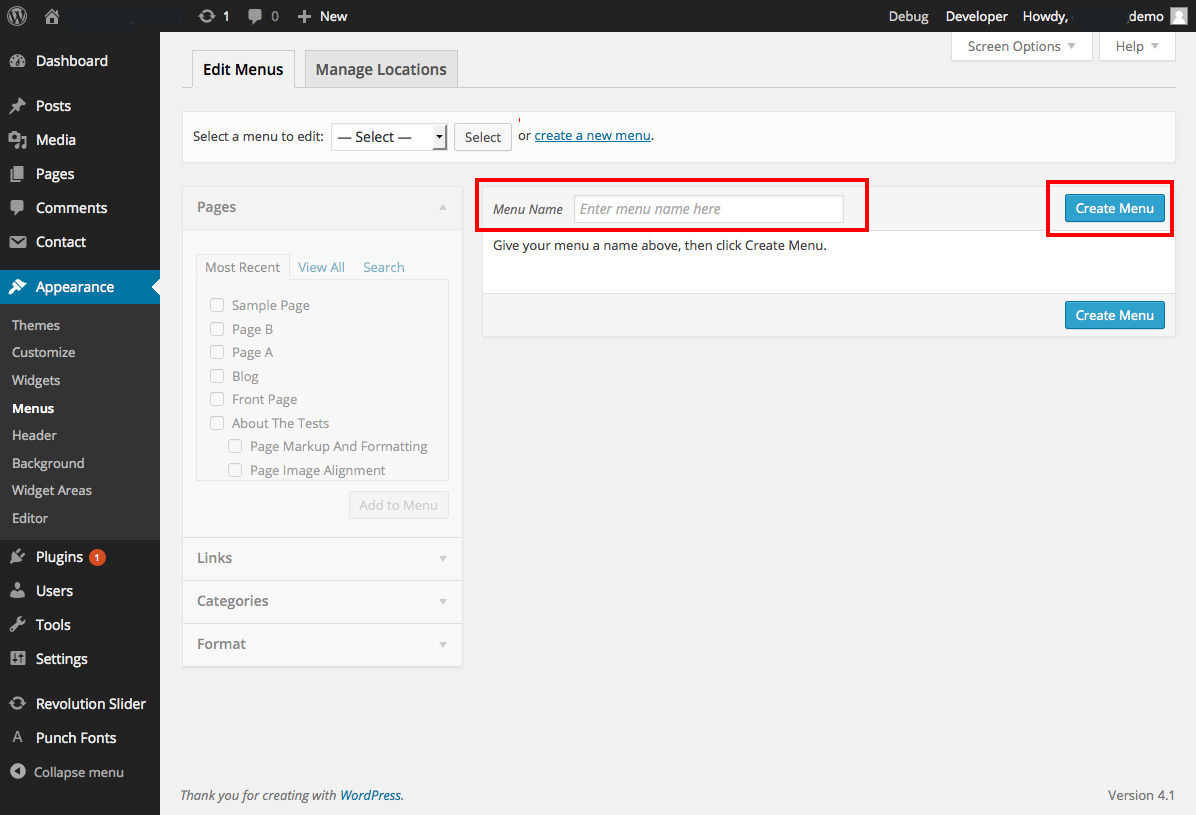
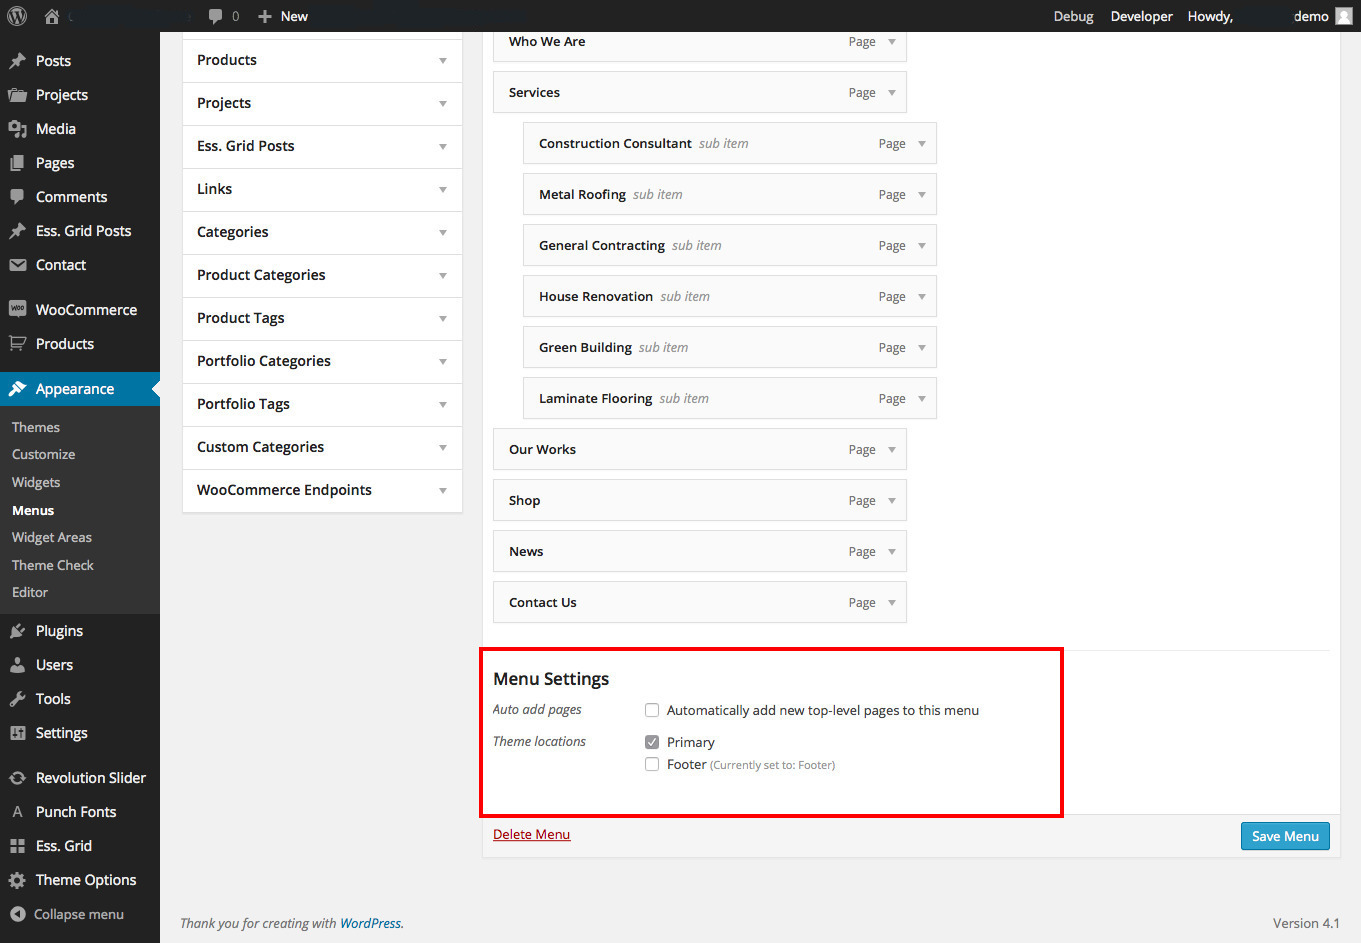
Step 1: Go to Appearance > Menus, enter your navigation name and click to Create Menu.
Step 2: Create new menu, drag item from the left to menu area and press Save Menu.
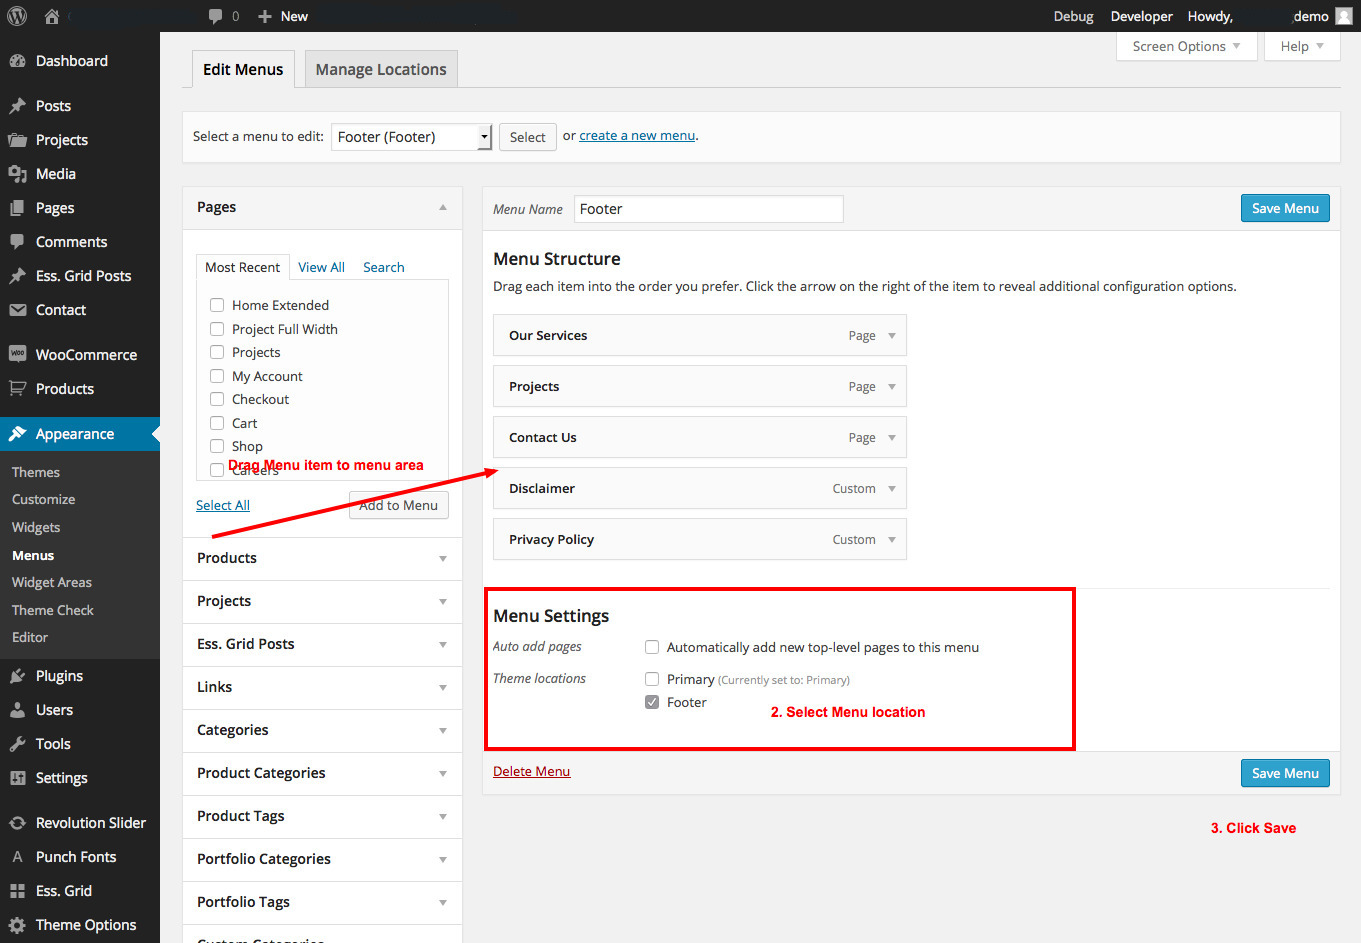
The theme offer three Menus locations: Main Navigation, Footer Navigation and Topbar Navigation.
Add your custom menu, drag any link/page/post ... to it and set menu location for it.
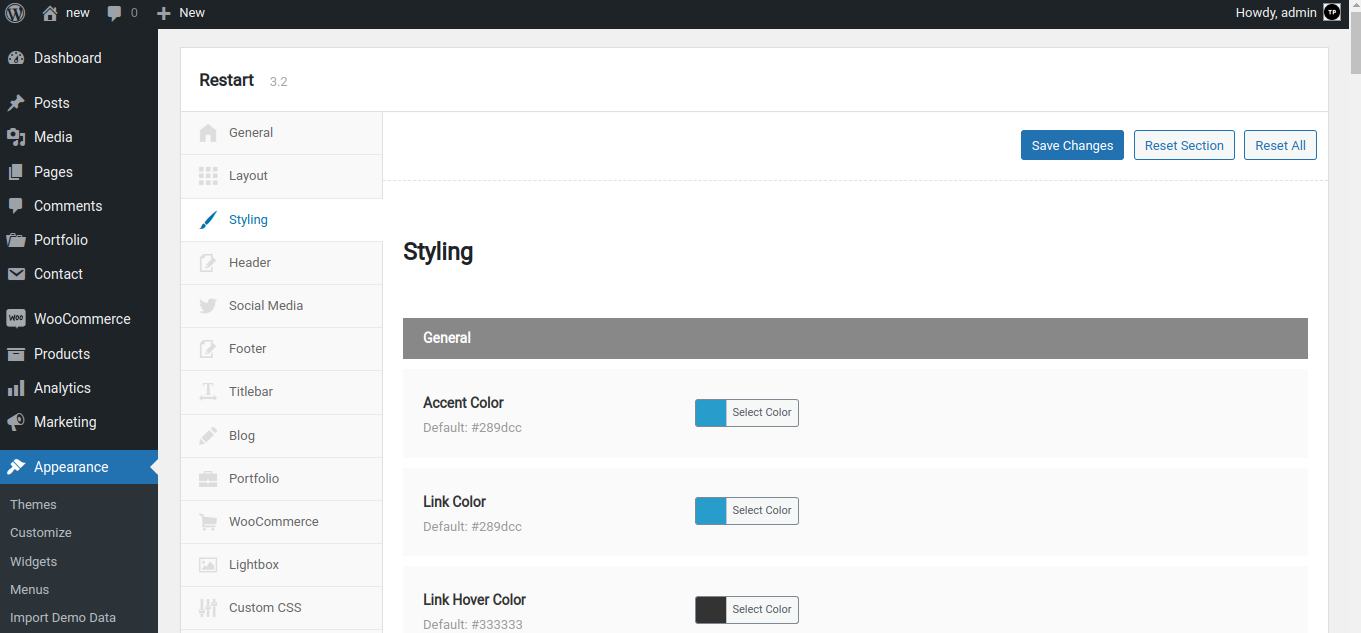
To change your main navigation style, go to Appearence > Theme Options > Styling. From there you will be able to change all the typography such as font-family, font-size, and color for entire theme.
This theme come with Revolution Slider premium license, in order to understand how the slider works and how to work with it, i prefer you read it's documentation live at: https://www.sliderrevolution.com/manual/.
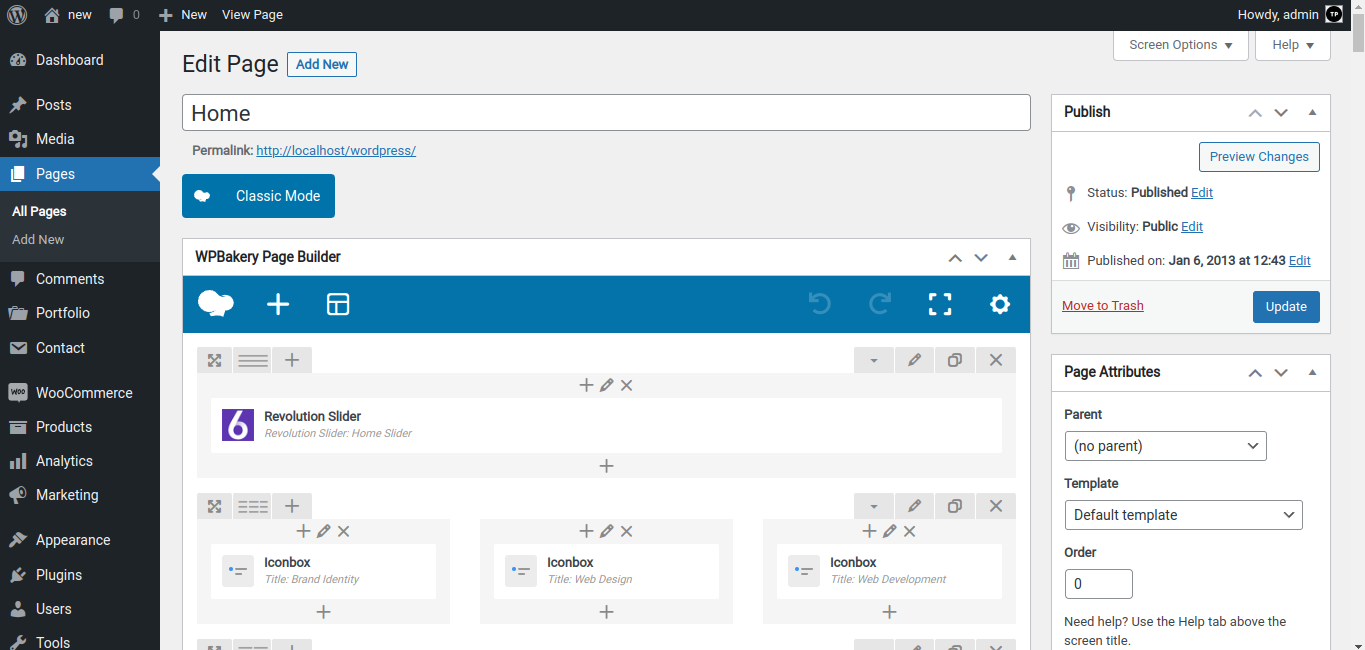
Step 1: Go to Pages > Add New and enter your page information.
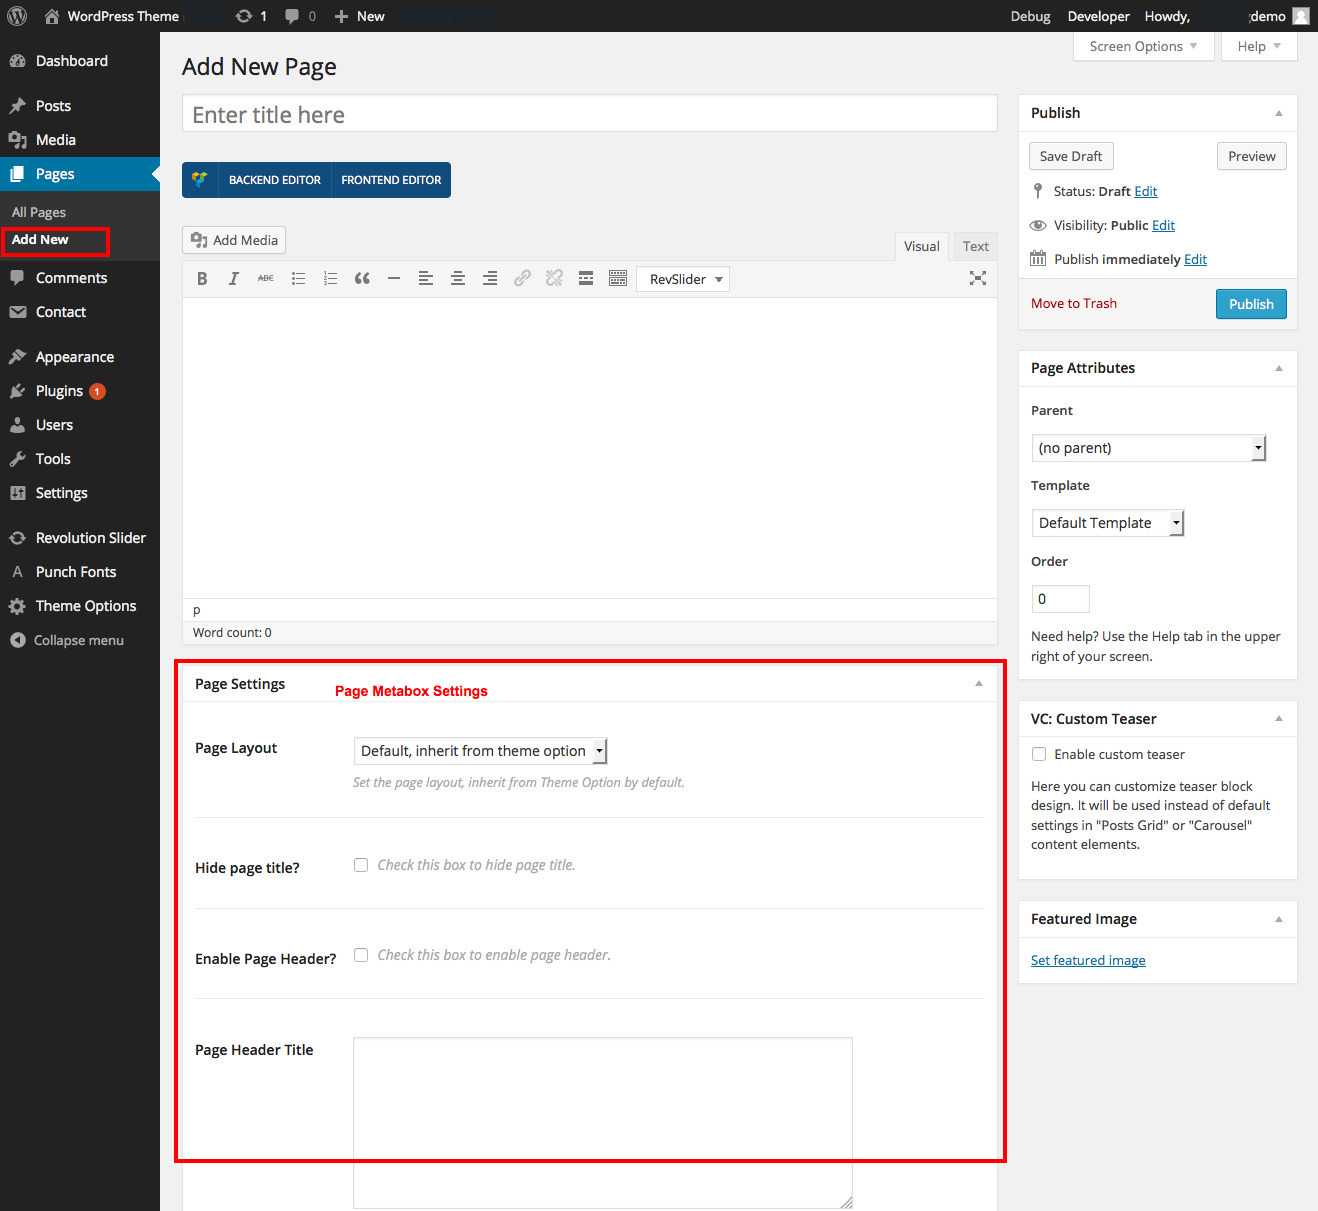
You can add your page content to the WYSIWYG editor, but if you would like to create a complex page with an page builder, click to Backend Editor and start use WPBakery Page Builder ( formerly Visual Composer ) to build your pages.
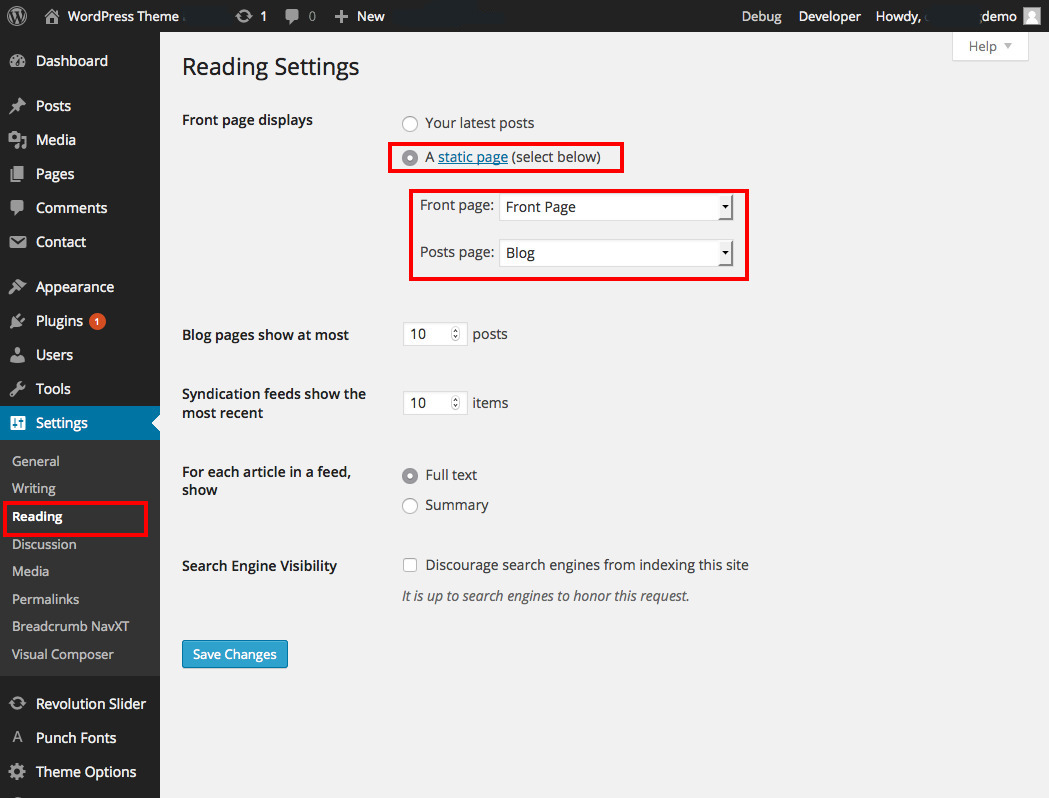
Step 1: Go to Settings > Reading and select which page you would like for your front page and for your blog page.
This theme includes support for the WPBakery Page Builder plugin. WPBakery Page Builder come with a lots of drag and drop modules to quickly and easily building your pages.
I perfer you read it's documentation live at: https://kb.wpbakery.com/ to know how it works.
Here is how it works with Restart theme:
List of WPBakery elements builded special for this theme:

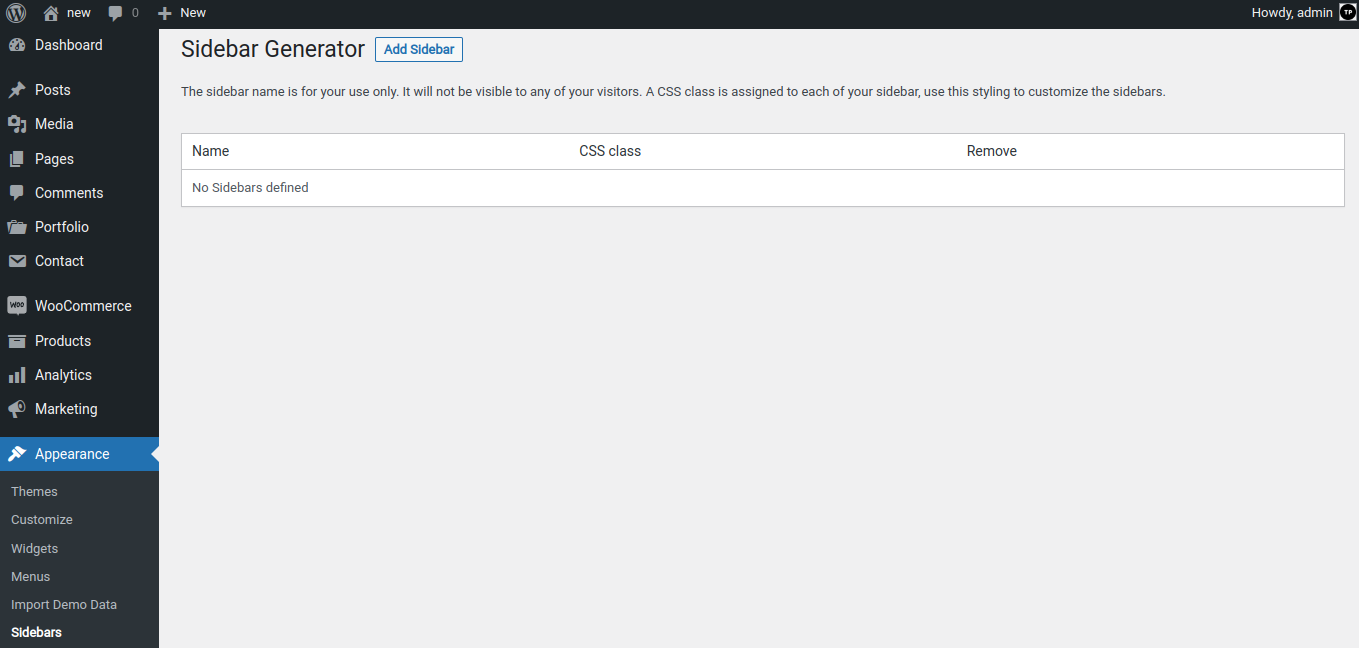
Was implemented Sidebar Generator in the theme, visible inside Appearance > Sidebars that will allow you to create unlimited sidebars for each pages separated.
The options panel is home to all of the theme's extensive configuration options. To view the panel, navigate to the Appearence > Theme Options in the left-hand menu. Here you have the ability to change many core aspects that make up how your theme looks and behaves.
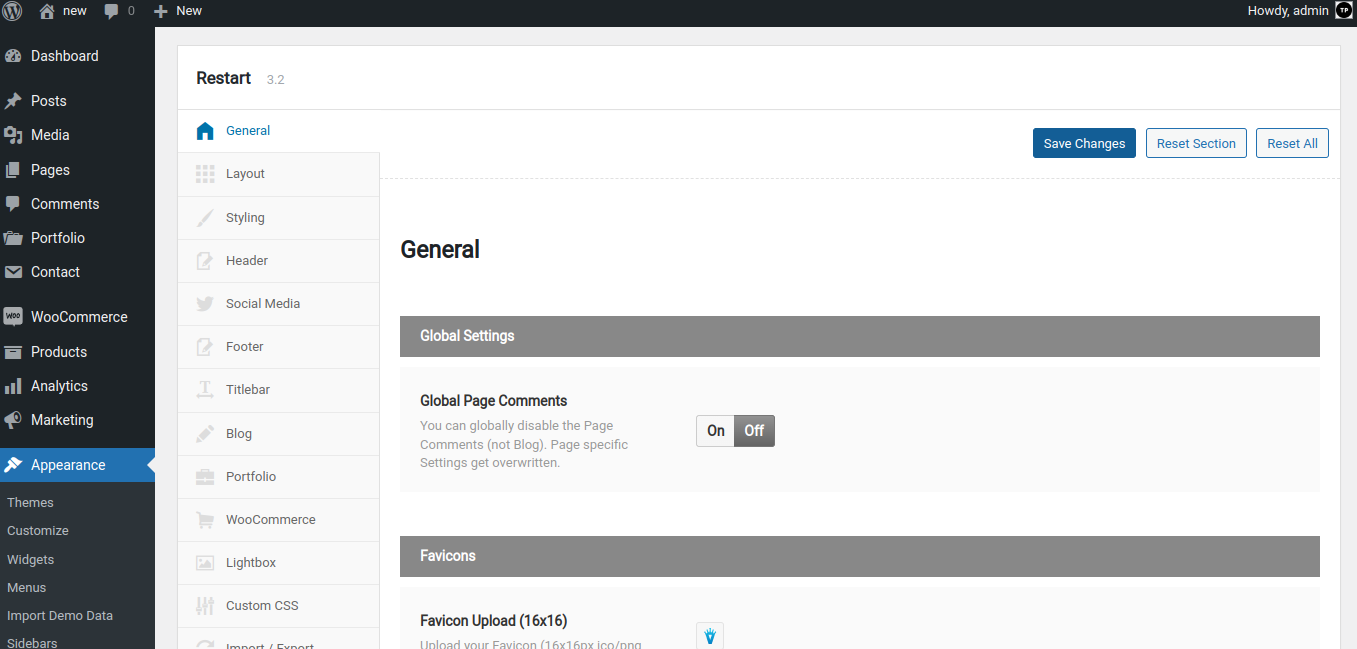
Go to Appearence > Theme Options -> Styling tab you will see advanded option to change your site's typography.
The option allow you to select from 600+ Google fonts. You also can change font color, size, ... etc.
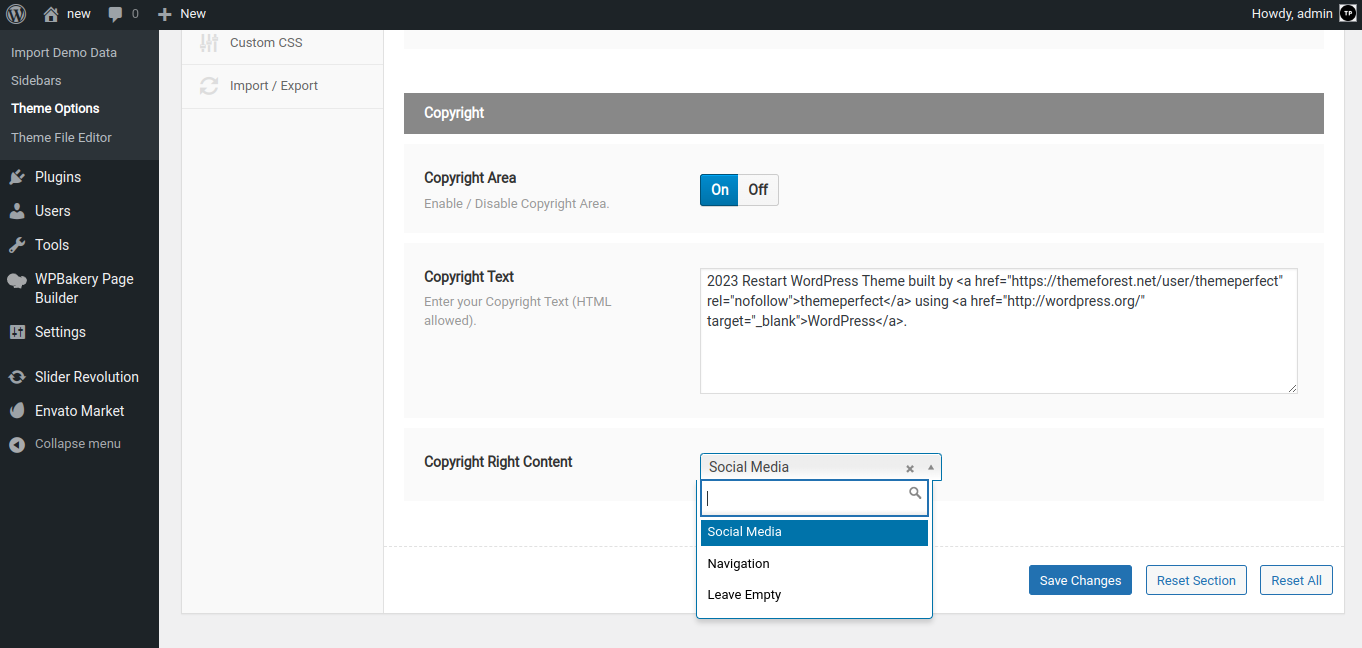
In order to display social icons at the footer, you will need to:
1. Enter your social profile URL:
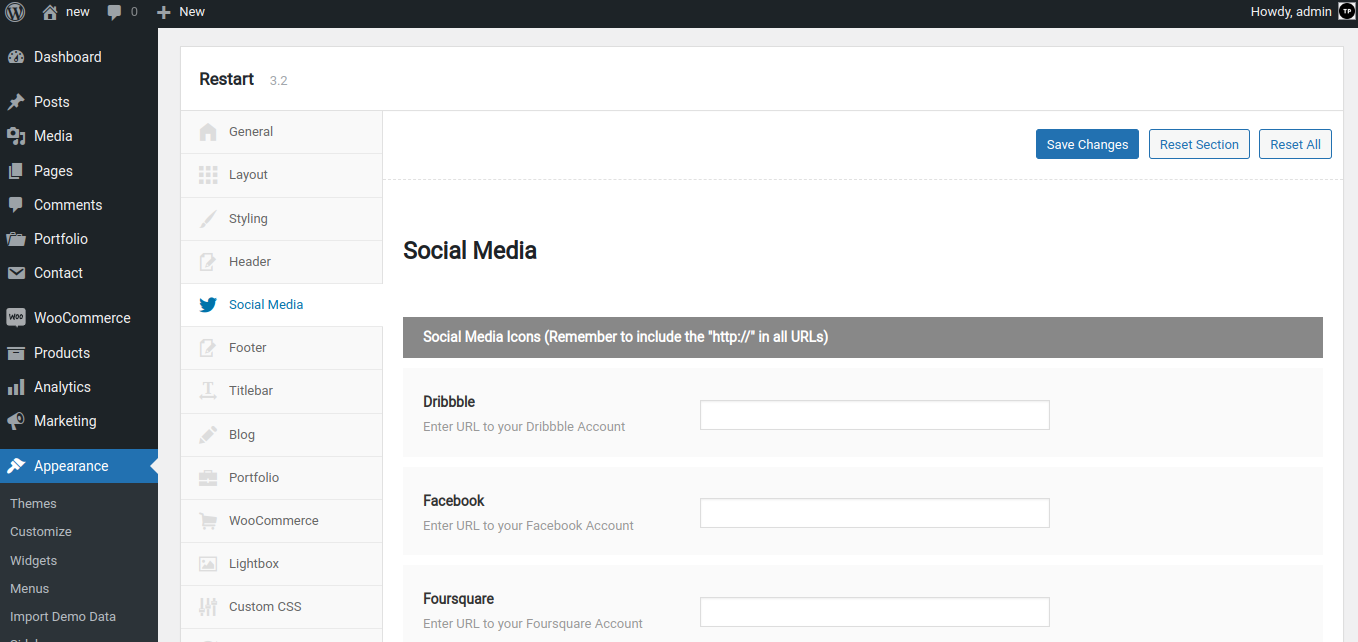
2. At Footer tab option, you will need to select Copyright Right Content setting to display Social Media:
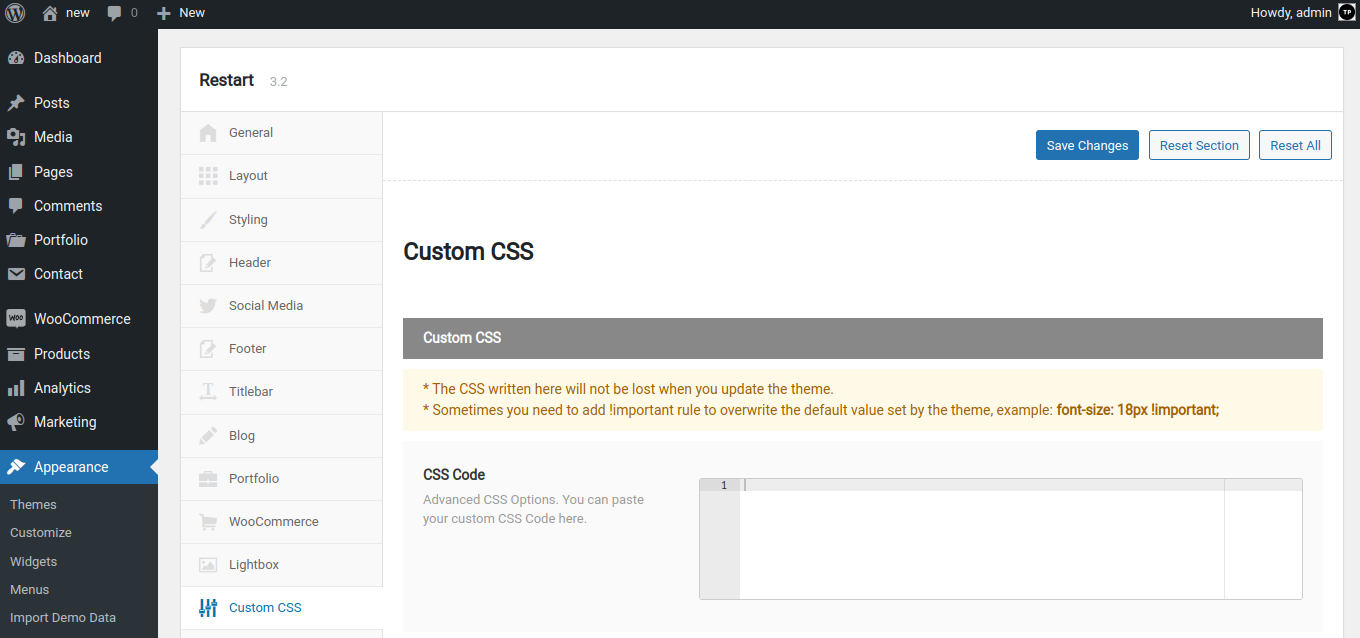
The best way to make CSS change without worry about getting lose when update theme to new version, we have build-in a tab called "Custom CSS", and you can enter your custom css code there and it will apply to your site.
Although, all the themes are optimized with H1, H2, H3, H4, H5 tags, clean code, HTML5 but if you want to get higher ranking on search engines, you must need some help check some of these plugins:
In order to use auto update feature, go to Envato Market WordPress Plugin page and download the plugin.
Then generate an Envato API Personal Token by clicking this link.
If you have any troubles while using auto update ( it is likely to be a permissions issue ) then you may want to manually update the theme via FTP or Cpanel.
Download the latest version of the theme on ThemeForest downloads page and simply replace with the old one via FTP or Cpanel.
Restart theme contains a language file restart.pot ( in restart/framework/languages/restart.pot ) which you can use to translate the theme. The .pot file is basically a list of all the text lines used in the theme files in English language.
Method: Using Poedit
Poedit is a common program which you can use to translate the theme. It’s available for free on poedit.net.
After you have installed Poedit, you can open it and select File > New Catalog from POT file. Then select the .pot file from the theme you wish to translate which you can find in the /restart/framework/languages/ folder of your theme.
Then go through every line of text and translate it to your native language. Afterwards you can save the catalog with your language code (for example es_ES.po). Normally Poedit automatically creates the .mo file and saves it, too.
The last step you have to do is to upload your created language files to the language folder of your theme using FTP.
Tell WordPress which language file to use
If you don’t use WordPress in your native language so far, you have to tell WordPress which language to use to activate the theme translation.You can do this by editing the wp-config.php file (the file is located in the main directory of your WordPress files) and defining the WPLANG constant. You have to set your language code there, for example fr_FR for French translation.
Just add the line below to your wp-config.php or change it if it already exists:
define ('WPLANG', 'fr_FR');